Blood Orange Upside-Down Corn Cake

Broa liquida de laranja (“Blood orange upside-down corn cake”)

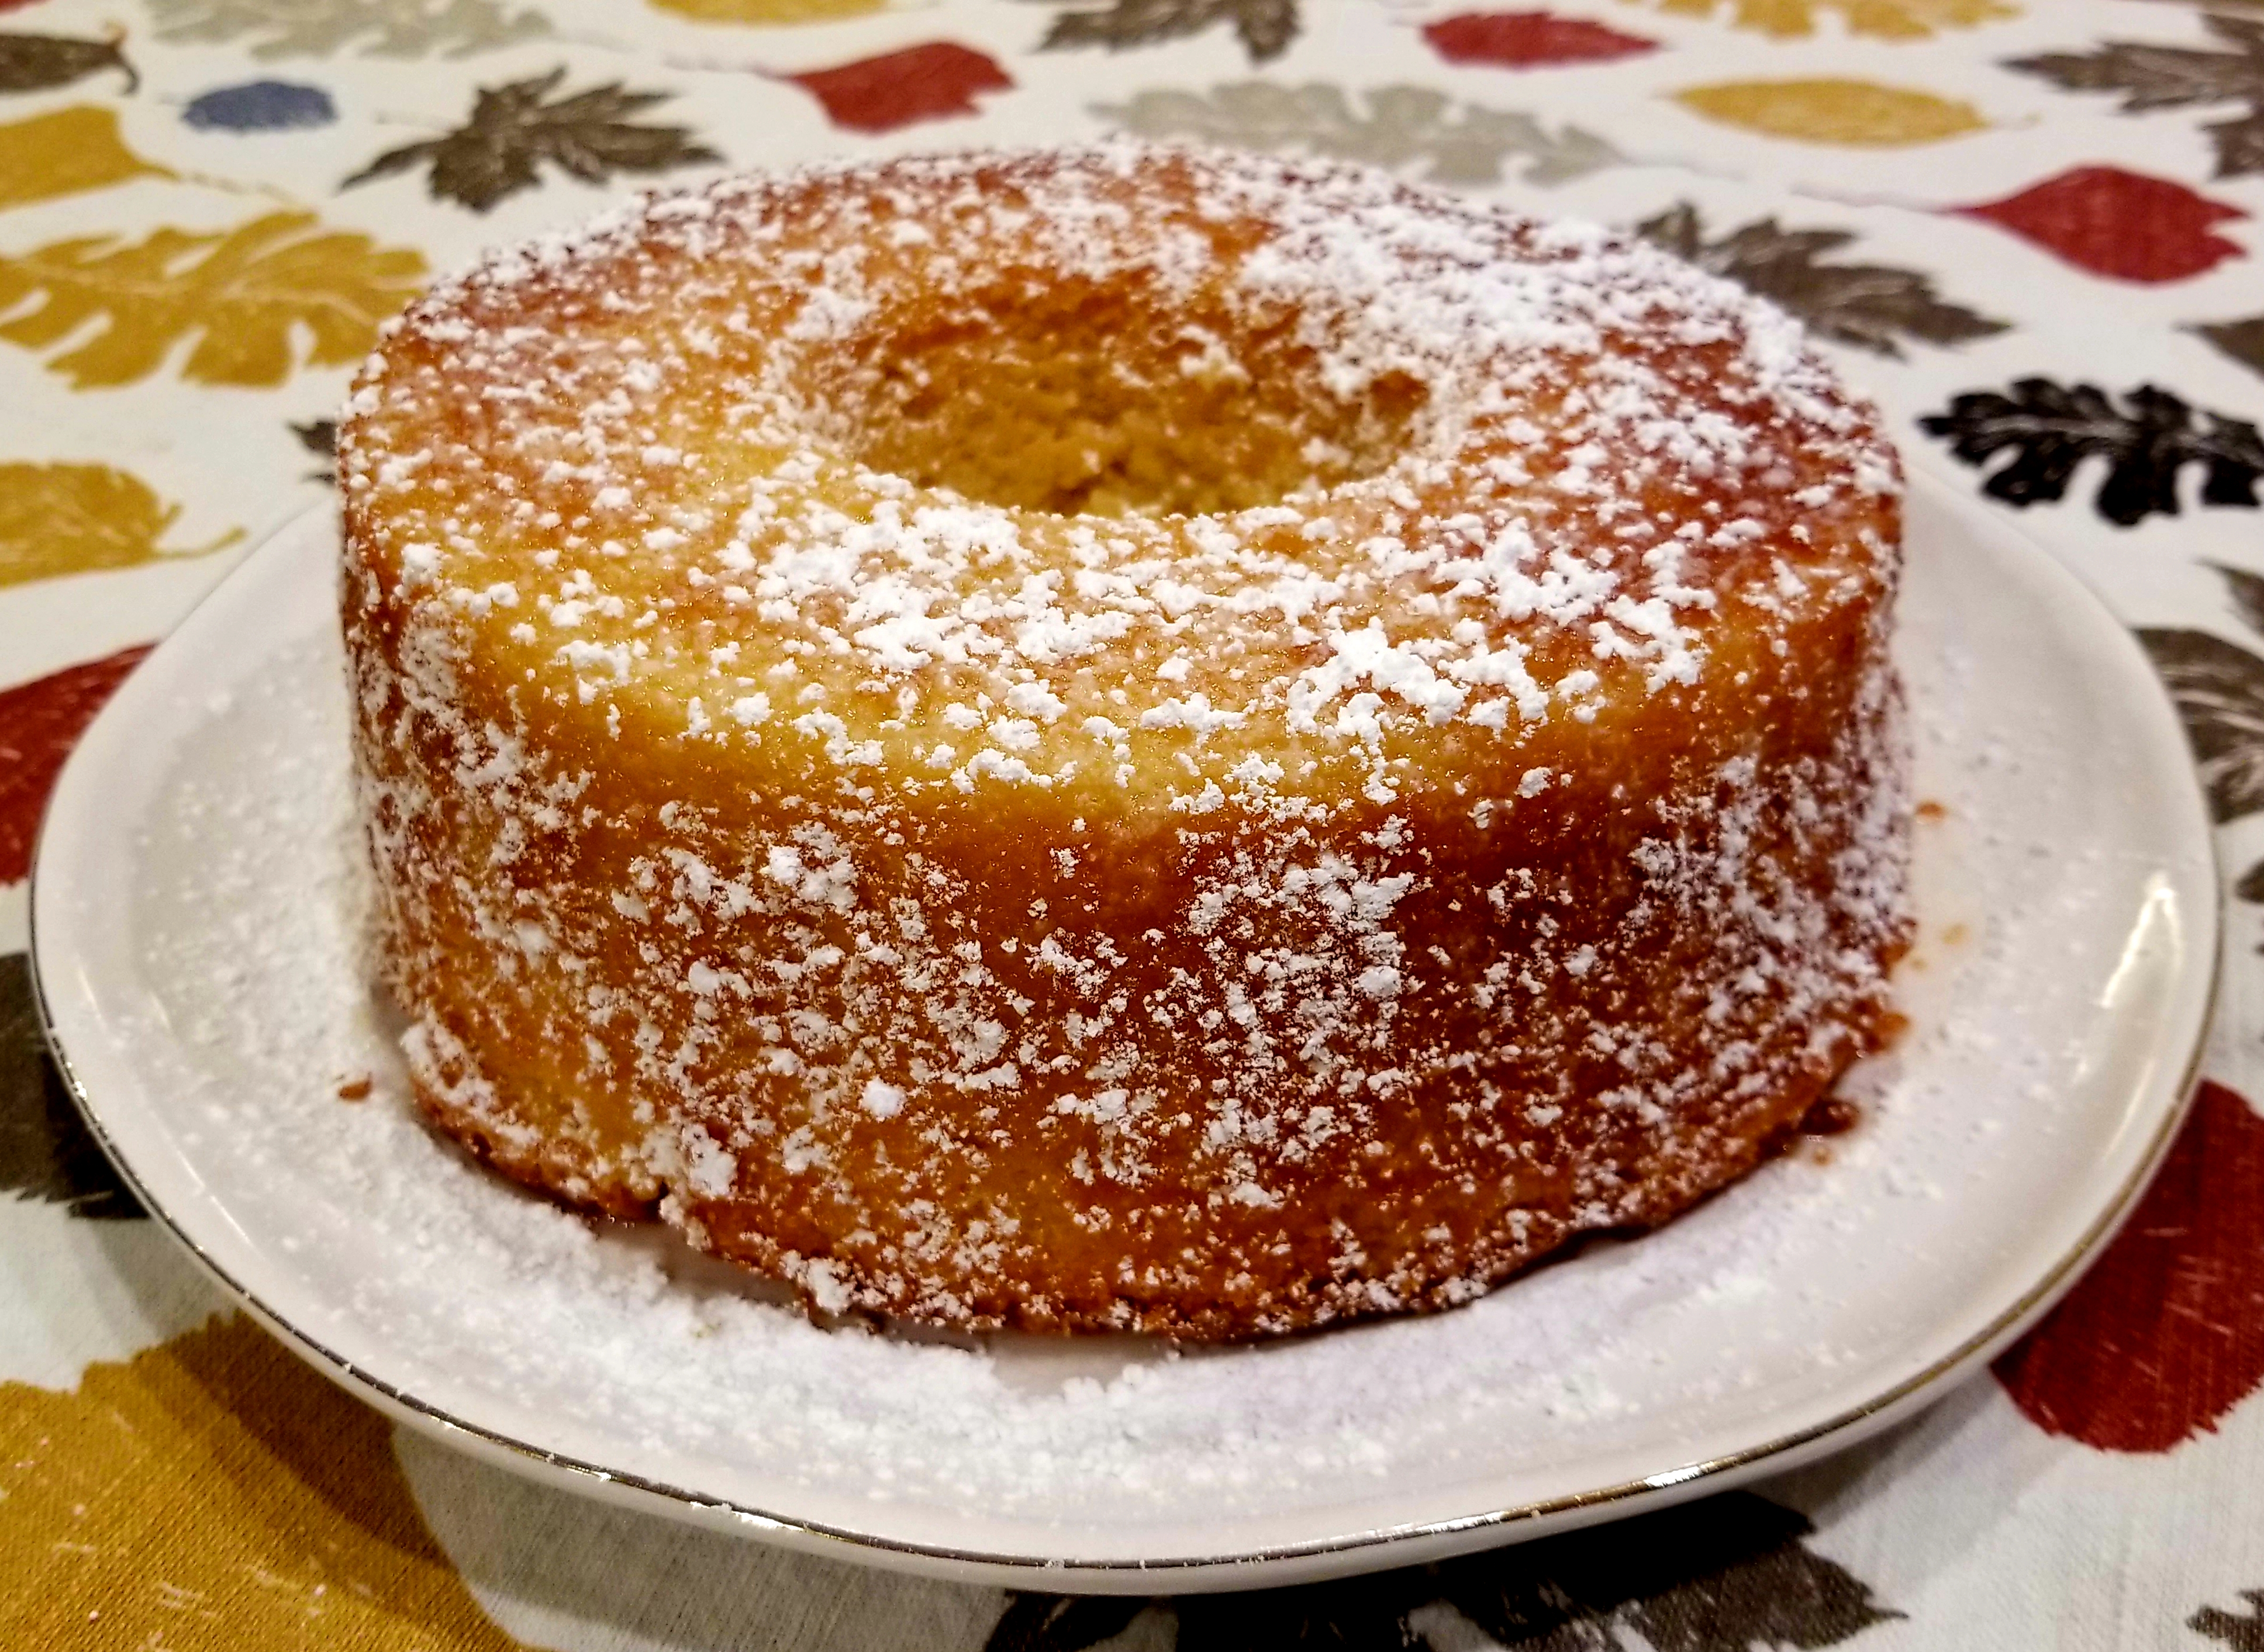
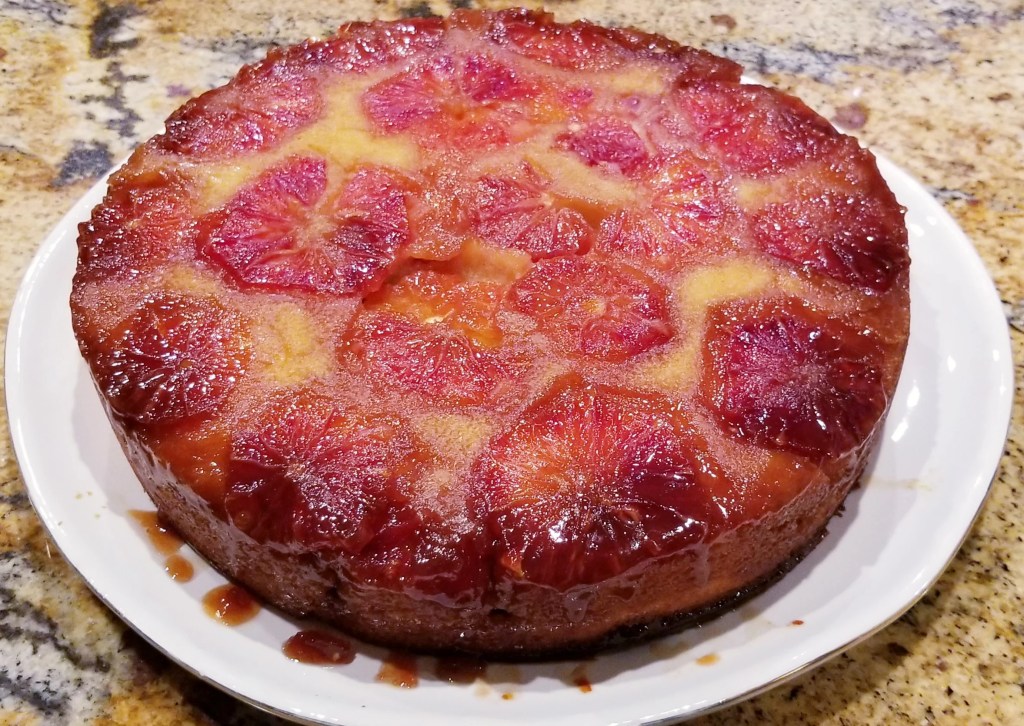
Blood orange upside-down corn cake (or Broa liquida de laranja in Portuguese) is a very moist cake, rather like a pudding. It’s perfect with coffee or tea, and a slice for breakfast is a must. This cake is simple to make. It’s elegant, beautiful and delicious.

Ingredients:

1 cup fine corn meal
1/2 cup flour
2 tsp baking powder
1/2 tsp salt
2 sticks + 4 tbsp butter
1/2 cup brown sugar
1 cup sugar
4 eggs
1 lemon
2 blood oranges (or any other sour orange)
3/4 cup of milk
1/2 cup sour cream (or plain yogurt)
1/2 tsp orange oil extract (or 2 tsp vanilla extract)

Directions:

1. Preheat oven to 350 F and grease well a 9-inch spring form cake pan (or round cake pan) with 1 tbsp of butter. (If using a round cake pan, line with parchment paper and grease the paper, leaving a 1-inch margin to ease removal.)

2 . In a bowl, mix flour, corn meal, salt and the zest of the two oranges.

3. Remove the white rind of the oranges and slice them thin.

4. In a pot over low heat, melt 3 tbsps butter with brown sugar and juice of 1/2 a lemon. Once fully melted, spread on the bottom of the prepared pan and arrange the orange slices on top.

5. Beat ingredients in a food processor in the following order:
a) 2 sticks of butter + sugar
b) eggs one at a time
c) milk + sour cream (or yogurt) + juice of 1/2 a lemon — until smooth
d) flour mixture
e) orange oil (or vanilla)
f) baking powder

6. Pour cake batter over oranges.

7. Bake for 50 minutes.

8. Let cake rest for 10 minutes.

9. Flip cake on to a cake plate and remove the mold or pan. (If using round pan, pull cake out by the paper, flip onto plate, and gently remove the paper.)

10. Serve with a cup of coffee or tea.

Enjoy!

Orange cake with chocolate frosting.

Orange cake with Chocolate Frosting and Orange Slices.

Orange cake is very popular in Brazil and there are endless recipes in the Brazilian kitchen. This recipe is for a basic orange cake. I like to frost it with a simple chocolate ganache and decorate it with orange slices or sprinkle chunks of chocolate over the frost.

I like to use Cara Cara oranges because they have a beautiful and vibrant color. The chocolate and the orange flavors really complement each other.

Orange Cake with Chocolate Frosting and Chocolate Chunks.

Ingredients for the cake:

3/4 cup vegetable oil or olive oil

2 tablespoons soft unsalted butter

1 1/2 cups of sugar

2 tablespoons orange liqueur like Cointreau or Grand Marnier

3 eggs

Zest of 2 oranges

Juice of 2 oranges

2 cups of flour

1 tablespoon baking powder

Ingredients for chocolate frosting:

4 oz semi sweet chocolate pieces

1/3 cup heavy cream

2 oranges or 1 cup chocolate chunks. If you can’t find chocolate chunks, use chocolate chips chopped in a food processor. Keep the bag of chocolate chips in freezer, it makes for an easier time chopping them in food processor.

Directions:

1. Pre-heat oven to 350F. Oil a round cake pan with a hole in the middle or a Bundt pan and set aside.

2. In a large bowl, mix flour and baking powder and set aside.

3. In a food processor, beat oil, butter and sugar. Add orange zest and orange liqueur, then beat. Add eggs one at a time and then orange juice.

4. Pour the liquid mixture over flour mixture and whisk until nicely blended. Pour batter in cake pan. Set cake pan in the middle of the oven and bake for 45 to 50 minutes or until fork comes out clean.

5. Let cake rest for 30 minutes before flipping onto a platter.

6. While cake is baking, make the ganache.

7. Melt chocolate pieces in a small pot. Once it’s melted, turn heat to low and add heavy cream. Stir constantly until well mixed. Remove from heat and set aside.

8. To assemble the cake, flip it over onto a serving platter and spread ganache on top and sides. If ganache is a little hard, add 1 tablespoon of cream and warm it over medium heat until easy to handle.

9. Slice oranges into thin slices and arrange them around the cake or sprinkle the top with chocolate chunks.

Enjoy!

Lemon Ricotta Cake

This is a delicious cake, very soft and fluffy almost like a pudding. It is wonderful anytime of the day. My family enjoys it for breakfast or in the afternoon with a cup of coffee or for a late snack with a cup of tea.

It is originally an Italian delicacy but very popular all over the world. In Brazil, we use limes instead of lemons. It is a bit more tart this way but still delicious. You can use either.

I used an Angel food cake pan for this recipe but you can use your favorite shape pan.

Ingredients for the cake:

  • 1 1/2 sticks of unsalted butter at room temperature
  • 2 cups of sugar
  • 2 cups of ricotta ( I use part skim for a lighter cake but whole milk will give a richer taste and consistency)
  • 3 eggs
  • 1 tea spoon lemon extract ( citrus extract or vanilla)
  • 3 lemons or limes
  • 1/2 teaspoon baking soda
  • 1/2 teaspoon sea salt
  • 1 cup flour
  • 1/2 cup almond flour
  • Powdered sugar for dusting and garnish

Ingredients for the glaze:

  • 2 lemons
  • 1/2 cup powdered sugar

Directions:

  1. Pre heat oven to 350F . Grease your favorite cake pan thoroughly with 1 tablespoon butter. Dust pan with 1/4 cup powdered sugar. Make sure entire pan is heavily coated with powered sugar and set aside.
  2. Mix 1/2 teaspoon sea salt with zest of 1 lemon or 1 lime using the tips of your fingers. Set aside.
  3. In a food processor beat the butter and sugar until white and fluffy. Add the ricotta cheese and beat again until well mixed. Add eggs one at a time processing after each egg and scrape the sides with a spatula then beat again.
  4. Now add lemon or citrus extract or vanilla and beat again. Add lemon or lime juices and beat again.
  5. Add flour, baking soda and zest sea salt and beat again until well blended. Pour batter into cake pan and bake for 45 minutes in center of oven or until fork comes out clean.
  6. While cake is baking, prepare the glaze. Mix juice of the 2 lemons or limes with the 1/2 cup powdered sugar in a small bowl. If using limes and it is too tart, add a bit more powdered sugar per your taste. Set aside.
  7. When cake is ready let it cool . Once cooled, place it on a platter and spoon the glaze over the top allowing the cake pores to absorb the glaze until glaze is all finished. Dust cake heavily with powdered sugar.

Enjoy!

Cooks tip: Use limoncello for the glaze instead of lemon or lime juice for a nice kick!

If you want a more caramelized finished add 2 tablespoons of turbinado sugar or raw sugar to the dusting of the prepared pan.

Apple Cake with Walnuts Cinnamon and Cloves.

Inspired by a recipe from Tatiana Bessa Coutinho.

What a wonderful cake!

When I saw a post by a friend about this cake on my Facebook page I immediately knew I had to make it so I asked for the recipe. This is an adaptation of Tatiana’s recipe to accommodate measurements and techniques used in the USA.

The original recipe calls for Fuji apples but any apple will do. This is actually a good recipe to use up some apples that are getting close to due date. I used honeycrisps in this recipe because I had them on hand. However, cooking apples like Granny Smith will give more of that tart taste.

I added a drizzle of caramel to the recipe because they go so well together and it gives the cake a nice finished look. I also sprinkled a little powdered sugar to top it off with a bang.

Ingredients for the Cake:

  • 4 apples
  • 1 cup sugar
  • 1 cup brown sugar
  • 1/2 cup vegetable oil
  • 3 eggs
  • 1/2 cup milk
  • 2 teaspoons vanilla extract
  • 2 cups all-purpose flour
  • 1 tablespoon cinnamon
  • 1/3 teaspoon ground cloves
  • 2 teaspoons baking powder
  • 1/2 teaspoon salt
  • 1 cup chopped walnuts
  • 1 cup raisins
  • 1 table spoon sugar and 1 table spoon cinnamon ( for topping)

Ingredients for the caramel:

  • 1/2 cup sugar
  • 1/4 cup hot water

Directions:

  1. Pre heat oven to 350F. Oil a Bundt cake pan or any cake pan with a hole in the middle sprinkle some flour and set aside.
  2. Peel and remove seeds from apples . Then shred apples in a food processor, transfer to bowl and set aside.
  3. Change the blade in the food processor to a mixing blade and mix eggs, oil, milk, sugars and vanilla. Mix well until creamy.
  4. In a large bowl, mix flour, cinnamon, cloves and baking powder. Make a dent in the middle and add liquid mixture. Mix well until fully incorporated, forming a thick dough. Add shredded apples, raisins and walnuts and fold them into the dough.
  5. Transfer dough to prepared cake pan and sprinkle cinnamon sugar mix over the top and bake for 35 minutes.
  6. While cake is baking, make caramel sauce. Safety tips before starting the caramel: use a long handle wooden spoon and keep your face away from pot. When hot water is added to high temperature sugar it will cause it to crystallize and splatter.
  7. Heat water and set aside. Melt sugar in a saucepan over medium heat stirring constantly. When sugar is melted and has a caramel color, turn heat to low and add hot water. Caramel will foam and crystallize a little but keep stirring at medium high temperature until melted again. Pour caramel into a glass saucer and set aside to cool and thicken.
  8. When cake is ready, remove from oven and let it cool for 30min. Then flip it over onto a serving platter, sprinkle powered sugar and drizzle with caramel sauce.

Enjoy!

Brazilian Corn Cake with Guava

IMG_20200623_170133_365.jpg

Bolo de Fubá com Goiabada

Minas Gerais is a Brazilian State known for delicious homemade guava marmalades and jams. It is also known for corn cakes, so adding the two together just makes sense.

Brazilian corn cakes are usually sweet and there are endless recipes with all sorts of variations and additions. They can be made with coconut milk, orange juice, caramel, guava, other marmalades and even cheese.

Here is a recipe for a family favorite made with guava marmalade — which can be found in many Asian markets at the Latin American, Hawaiian and the Philippines sections. It is also very easy to find online.

Corn Cake with Guava is a wonderful treat with a cup of coffee or tea anytime of the day.

Ingredients:

  •  1 cup of sugar
  •  1 cup milk
  •  1/2 cup vegetable oil
  •  1 egg
  •  1 cup very fine corn meal (not coarse)
  •  1 cup flour
  •  1 table spoon corn starch
  •  1 table spoon fennel seeds
  •  1 table spoon baking powder
  •  approximately 12  pieces of guava marmalade about 1 inch sizes
  •  1/2 cup guava jelly or jam
  •  1 table spoon unsalted butter

Directions:

  1. Heat oven to 350F. Line medium-size rectangular cake pan with parchment paper, leaving a small edge on the sides to pull the cake when ready and grease it. Set aside.
  2. Beat sugar, oil, egg and milk in a food processor or blender.
  3. Mix corn meal, flour, corn starch in a large bowl. Add liquid mixture and gently mix with a whisker until well blended. Add baking powder, fennel seeds and fold in well.
  4. Pour batter in cake pan spreading evenly. place the guava pieces inside batter and bake for 35 to 40 minutes.
  5. While cake is baking, place guava jam or jelly in a sauce pan at a medium heat and stir constantly until it melts. turn off heat and stir in the butter.
  6. When cake is ready spread the melted guava over the top. If guava hardened, heat it up again on a low heat. Let cake rest and cool. Pull it out of the pan by the parchment paper.
  7. Cut cake in squares and place on serving platter.

Enjoy!


Milk Caramel Fudge Roll Cake

IMG_20200503_184957_664.jpg

“Rocambole de Doce de Leite”

Rocambole is a Brazilian version of the Swiss roll. Brazilians like to make this rolled up sponge cake filled with milk caramel or guava marmalade. Soft milk caramel and guava marmalade can be easily found at the Latin foods isle of most grocery stores. You can also make your own milk caramel by cooking a can of condensed milk*

It is a delicious treat!

Ingredients:

  • 3 eggs
  • 1/3 cup skim milk
  • tea spoon vanilla
  • 3/4 cup all purpose flour
  • 1/4 tea spoon salt
  • 1 can dulce de leche ( nestle) or 1 can condensed milk
  •  powdered sugar and cinnamon.

Directions:

*To cook a can of condensed milk, place the can inside an instant pot, cover the can with water, and press the canning function. Remove the can once all pressure is out. Open it and pour caramel into a bowl and stir with a fork to smooth it.

* If you don’t have an instant pot, place the can of condensed milk in a pot, cover it with water and cook it in a water bath over medium heat for 1 hour and a half. Keep hot water handy to fill in water bath and pot as water levels reduce with heat. Do not let waters dry completely or can will explode. The can of condensed milk has to be covered with water and the water bath has to have about 2 inches of water at all times. This process is easy but requires constantly watching the water levels. Once cooked, remove the pot from the water, open the can and pour the caramel in a bowl. Stir with a fork to smooth it.

  1. Heat oven to 375 F. Line a cookie sheet with parchment paper, leaving a border and grease it with butter or oil.
  2. Sprinkle a cloth towel with about 1/2 cup powdered sugar and set aside.
  3. Using a food processor or electrical mixer, beat the eggs until thick and creamy. Gradually, add sugar, then milk, and vanilla. Next, add flour, baking powder and salt, and beat until smooth. Pour batter into cookie sheet and make sure it is spread all over.
  4. Bake for 12 minutes or until fork comes out clean. When cake is ready,  turn it over immediately into the towel with sugar, remove the paper and carefully roll it. Set aside on a rack to cool for about 30 minutes.
  5. Unroll the cake and remove the towel. Spread milk caramel all over the top and gently roll it back up. Place it on a serving platter and sprinkle powdered sugar and cinnamon.

Tasty!

Brazilian Lime Torte

20191006_000736.jpg

                                                “Torta de Limão”

Lime Torte is a very popular Sunday dessert.  Usually, on Sundays, families get together and share a special meal with scrumptious desserts and tortes just like this one.  Cold, creamy, delicious. The original lime torte is made with a top of merengue, but I confess, I am terrible at making merengue, so I like to make this recipe with a topping of chantilly cream and a touch of limoncello instead. Limoncello is an optional ingredient,  but I think it really adds to the recipe.  The original crust is made with corn starch cookies “biscoitos de maizena”, but they are very difficult to find, so in this version, I use honey and oats crunch bars. They work beautifully in this recipe. This is a great recipe to make ahead of time. A day before is good because the torte is left to chill more and the flavor concentrates better. You don’t want to eat this warm.

20191006_000801.jpg

Ingredients:

  •  4 Honey and oats crunch bars
  •  4 tablespoons of butter
  •  2 cans condensed milk
  •  10 limes
  •  1 egg
  •  2 cups whipping cream
  • 1/2 cup powdered sugar
  •  3 ounces of limoncello

Directions:

  1. Pre heat oven to 250F.  Crumble the honey and oats bars in a food processor,then transfer to a bowl. Melt the butter and mix it into the crumbs using a fork. Press this mixture in a rectangular dish and bake it for 10 minutes. Set aside.
  2.  While the crust is baking, in the food processor, mix the condensed milk, juice of 8 limes and the egg; beat well. Spread the mixture on top of the crust and bake at 250F for 30 minutes.
  3.  While the torte is baking, whip the cream in the food processor until fluffy, transfer to a bowl and slowly add powdered sugar, folding in with the help of a fork. Then, slowly add the limoncello also folding the cream with a fork to preserve the air bubbles. Cover bowl and keep it in the refrigerator.
  4.  Once torte is baked, let it cool . Cover and place it in the redrigerator for at least 4 hours. Spread the chantilly cream over the top and decorate it with thin slices of 2 limes ( wash limes before you slice). Place it back in the refrigerator for another 2 hours or overnight.

Enjoy!

20191005_212459.jpg

Brazilian Coconut Cake with Creamy Coconut Caramel Sauce


Bolo de Côco com Bába de Môça.

20190929_172038.jpg


20190929_1159583275786784854550880.jpg

Brazilians love coconut! Well, most of them. There are so many recipes from sweet to savory that uses coconut; I can safely say, coconut is definitely a signature Brazilian ingredient. The recipes for coconut cakes are endless and it is my pleasure to share all the ones I love to make for my family and friends.

If you are following this blog, you will notice that there are other recipes, in which I used the same coconut caramel sauce. It is a very popular sauce to use on desserts and cakes in Brazil. In Portuguese, it is called, “Bába de Môça”. It is sooo good!

This recipe can easily be made vegan. Vegan alternatives will be posted side by side with original ingredients.

Ingredients to make the Cake

  • 2 cups of flour ( I like to use 1 cup of flour and 1 cup of coconut flour)
  • 1 cup of sugar
  • 1 cup of coconut flakes
  • a pinch of salt
  • 1 table spoon baking powder
  • 4 table spoons of softened butter or 1/4 cup coconut oil
  • 3 eggs ( use vegan egg substitute if making this cake vegan)
  • 1 and 1/2 cup coconut milk ( from the dairy section)
  • 1/2 tea spoon of vanilla extract

Ingredients for Coconut Caramel Sauce

  • 1 cup sugar
  • 1 can light coconut milk.

Directions

  1. Pre heat oven to 350F and lightly grease a cake pan ( I like to use a bundt pan).
  2. Mix butter or oil with sugar in a food processor, beat it until creamy and smooth. Add coconut flakes and pulse a few times. Add eggs and beat it again until well mixed. Add vanilla and coconut milk and beat it again.
  3. Then, add flour and salt, and mix well. Finally, add baking powder and pulse a couple times.
  4. Pour dough mixture in the cake pan and bake for 35 minutes or until the fork comes out clean. Let it rest.

Let’s make the sauce

  1. Heat sugar in a sauce pan, stirring constantly to caramelize the sugar. Once sugar is melted, turn heat to low and slowly add the coconut milk. The sugar will sizzle, so stay back for a few seconds to prevent getting burned. The sugar will harden a little, forming gooey caramel pieces, so it is important to keep stirring constantly for them to melt back to the sauce. Turn heat to high to help hard pieces of caramel melt faster. Once all melted, pour sauce in to a glass container. If there are still gooey pieces in sauce, heat it in microwave for 15 seconds.
  2. Turn cake over on to a serving platter and drizzle coconut caramel sauce over it. Save about half the amount of caramel sauce to drizzle over individual pieces.
  3. If the caramel hardens, just put it back in microwave for 10 seconds.

This cake is also delicious with a scoop of coconut or vanilla ice cream on top and a drizzle of coconut caramel sauce over it.

Note: English is not my first language, I apologize for any incorrections or mispellings. Please feel free to contact me in my inbox with any corrections. I just ask to be kind! Thank you


Banana Cake with Caramel Swirl

Bolo de Banana com calda de Caramelo

20190712_160918

Bananas are a very common fruit in the Brazilian house hold and there are several types of bananas everywhere. They are inexpensive and widely available, which means lots of different recipes for banana cake. Banana cake with caramel sauce is one of my favorites because it’s easy to make with only two bananas and it’s very flavorful.

Ingredients:

  • 2 cups of cake flour
  • 3 eggs
  • 2 bananas mashed
  • 1 cup sugar
  • 1 cup brown sugar
  • 3/4 cup oil
  • 3/4 cup milk
  • 1 tbsp cinnamon
  • 1 tbsp baking powder

For Caramel:

  • 1 cup sugar
  • 1 cup hot water

Directions:

  1. Pre-heat oven to 350F and grease a round cake pan with a hole in the middle.
  2. Add all ingredients for the cake (except for the baking powder) to a bowl and mix well until smooth,preferably an electrical mixer. Add baking powder. Gently mix.
  3. Transfer to the baking pan and bake for 45 to 50 minutes. The cake is ready when fork comes out clean.
  4. While the cake is baking, melt sugar in a sauce pan, stirring constantly until it is golden brown. Turn heat to low and add 1/2 cup of hot water. Keep stirring to prevent the sugar from hardening. If needed, add the rest of the hot water and keep stirring until a caramel sauce is formed. Transfer the sauce to a glass cup and let it rest until the cake is finished and cooled. Once the cake is cooled, transfer it to a serving platter and drizzle with the caramel sauce.

Enjoy!


Caramel and Chocolate Torte


                     ( Torta  de Doce de Leite e Chocolate)

It’s oozing with goodness!

This is a very rich dessert. It is cold, smooth, and silky. Absolutely divine! It is very easy to make but requires a few steps. I recommend to start a day before serving.

Originally, this dessert was made with “Biscoito Maria”, a type of corn starch, and sugar  cookies or “Biscoito Champagne” ( lady finger cookies), but both can be difficult to find,  so I substituted them for chocolate graham crackers, which are widely available at all grocery stores.


20190528_133830

Ingredients:

  • 1 box chocolate Graham Crackers
  • 1 can condensed milk
  • 1/2 cup half and half
  • 4 oz semi-sweet dark chocolate
  • 1 pint heavy cream
  • 4 tbsp butter
  • 4 tbsp sugar

Directions:

  1. To  make milk caramel, place condensed milk inside a digital pressure cooker, cover the can with water, and close the top. Set it for canning and let it cook until the pressure is completely out. If using a regular pressure cooker, let pressure build at high heat. Once the pressure builds, turn heat to low and let it cook for 15 minutes, then turn off the heat and let it cook until the pressure is completely out. If you do not have a pressure cooker, fill a pot with water and let the can cook for 30 minutes. Keep hot water handy in case you need to add hot water. Do not let the water dry out because the can will explode; stay close to the pot. In all the cases, make sure there is enough water to cover the can. Once cooked, remove the can from the hot water and let it cool.
  2. While the can is cooking, pre-heat the oven to 350F. Place one and a half packets of chocolate crackers in a food processor to make crumbles. Place the crumbles in a bowl and add melted butter; mix them with a fork. Press this mixture inside a removable tart ring with the help of a spoon and bake for 10 minutes. Set aside to cool.
  3. Meanwhile, whip heavy cream and set it in the refrigerator.
  4. Melt chocolate in a water bath. Once melted, add half and half and stir until a silky chocolate cream is formed. Set aside.
  5. Remove cream from the refrigerator and divide it in half. Place one half back in fridge and add the sugar to the other half by folding it gently with a fork to preserve the air pockets. Add melted chocolate to the cream and gently  mix to preserve air pockets. Place it in fridge.
  6. When the can of condensed milk is cooled, open and fold the milk caramel with the other whipped cream and sugar that was resting in fridge. Whisk gently until a creamy silky mixture is formed. Place this mixture back in the fridge.
  7. Both the chocolate cream and the milk caramel cream should be left in fridge for at least 2 hours to firm.
  8. Once both creams are firm, spread the milk caramel over the crust of chocolate crackers. Break the rest of the chocolate crackers into small pieces and cover the caramel mixture with the broken pieces. Then, spread the chocolate cream on top.
  9. Place the tart mold on a plate, and cover it with another plate. Place in the freezer for at least 2 hours.
  10.  Before serving, remove the torte from the freezer and let it stand for 5 minutes. Turn the plates over to remove the tart ring and …voila! It is ready! Wait another 5 minutes before cutting.

*Store in refrigerator. The freezer was only to help remove dessert from tart ring.